


RIBBON FLOWER TUTORIAL
You will need:
-7/8" Ribbon
-Scissors
-Thread
-Needle
-Hot Glue
-Button
-Fabric scrap
-7/8" Ribbon
-Scissors
-Thread
-Needle
-Hot Glue
-Button
-Fabric scrap
1. Grab your 7/8” size of ribbon.
2. Cut 5
pieces that are each 3” long.
3. Find the
middle of each ribbon and pinch it in half. Sew it closed with your thread and
needle (Example 1).

4. Fold the
edges of each piece in half so the raw edges meet. Each piece will look like
Example 2.

5. Start with
a knot and run a gathering stitch along the bottom of each piece (Example 3).
Keep the stitches uniform.

6. Put your
last stitch through the first piece so it forms a circle- DO NOT TIE A KNOT YET
(Example 4).

7. Cinch it all
tight in the center (Example 5). Tie a knot to hold it in place. Keep it as tight as you can J

8. Hot glue a
button or ***fabric covered button to the center. Make sure you look which side
is top and bottom. Glue button to the top side.
You can trim loose or fraying ends before you glue the button on.
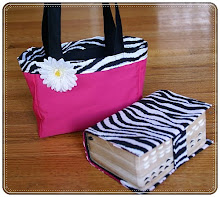
9. Hot Glue
the ribbon flower on to your clip/barrette or scripture cover or tote.
You are all DONE!
***For a fabric covered Button,
cut out a circle of fabric slightly bigger than your button. Run a gathering stitch around the edges of
the circle. Place button in the center
and cinch the thread around the button. Tie a knot to hold it all together
(Example 6).


2 comments:
Thanks for the tutorial! These are so cute!
Thank for the tutorial!!!!
Post a Comment